How To Make A Rotary Tool
If you are a DIY enthusiast or a hobbyist, having a rotary tool can be incredibly useful. A rotary tool, also known as a Dremel tool, is a versatile handheld power tool that can be used for a variety of tasks, such as cutting, sanding, polishing, grinding, and more. While there are many rotary tools available in the market, making your own can be a fun and rewarding project.
To make a rotary tool, you will need a few basic components. First, you will need a small electric motor, preferably a high-speed motor, which will provide the power for your tool. You can salvage a motor from an old power tool or buy one from a hardware store. Next, you will need a suitable housing for your motor. This can be a 3D-printed housing or a custom-made housing using materials like wood or plastic.
Once you have the motor and housing, you will need a way to attach various attachments and accessories to your rotary tool. This can be done using a collet or chuck mechanism, which will securely hold the attachments in place while the tool is in use. You can purchase a collet or chuck mechanism from a hardware store or design and 3D-print your own.
Finally, you will need a power source for your rotary tool. This can be a standard wall outlet, a battery pack, or even a power bank. Make sure to choose a power source that is compatible with your motor’s voltage and amperage requirements. If you are using batteries, consider using rechargeable batteries for convenience.
Once you have gathered all the necessary components, you can start assembling your rotary tool. Begin by attaching the motor to the housing using screws or any other suitable method. Then, install the collet or chuck mechanism to the motor shaft to allow for easy attachment and removal of accessories. Finally, connect the power source to the motor and test your rotary tool to ensure that it is functioning properly.

Making your own rotary tool can be a rewarding project that not only saves you money but also gives you a sense of accomplishment. With a little bit of creativity and resourcefulness, you can create a customized tool that meets your specific needs and preferences. So, why not give it a try and unleash your creativity with a homemade rotary tool?
Choosing the Right Materials
When it comes to making a rotary tool, choosing the right materials is crucial to ensure its durability and longevity. Poorly chosen materials can lead to a subpar tool that breaks easily or doesn’t perform as expected. Here are some factors to consider when selecting materials for your rotary tool:
1. High-Quality Steel
The main components of a rotary tool, such as the shaft and the cutting bits, should be made from high-quality steel. Steel is known for its strength and ability to withstand pressure and heat. Look for materials like carbon steel or stainless steel, which provide excellent durability and performance.
2. Durable Plastic

In addition to steel, many rotary tools have plastic components, such as the housing or the handle. Choosing a durable plastic that can withstand constant use and exposure to harsh conditions is important. Look for materials like ABS (Acrylonitrile Butadiene Styrene) or nylon, which are known for their strength and resistance to impact.
3. Heat-resistant Coatings
Since rotary tools generate a lot of heat during operation, it’s crucial to select materials with heat-resistant coatings. These coatings help protect the tool from damage caused by excessive heat and ensure its longevity. Look for materials with coatings like ceramic or Teflon, which provide excellent heat resistance.
4. Ergonomic Handles
The handle of the rotary tool should be comfortable to hold and easy to grip. Choosing a material with ergonomic properties, such as a rubberized or textured surface, can greatly improve user experience. Look for materials that offer a combination of comfort and grip to ensure precise control and reduced hand fatigue.

5. Corrosion Resistance
Rotary tools are often exposed to moisture and other elements that can cause corrosion. Choosing materials with corrosion-resistant properties is essential to prevent rust or deterioration. Look for materials like stainless steel or aluminum, which have excellent resistance to corrosion.
By considering these factors and choosing the right materials, you can create a rotary tool that is durable, high-performing, and built to last.
Understanding the Key Components
A rotary tool is a versatile device that can be used for various tasks, from woodworking to metalworking, and even crafting. To understand how to make a rotary tool, it’s essential to first understand its key components and how they work together.
The main components of a rotary tool include:

1. Motor: The motor is the heart of the rotary tool. It provides the power needed to rotate the tool’s attachments at high speeds. The motor’s power rating determines the tool’s overall performance, so it’s important to choose a motor with sufficient power for your intended use.
2. Speed Control: Many rotary tools come with variable speed control, allowing you to adjust the rotation speed as needed. This feature is especially useful when working with different materials that require different cutting or grinding speeds.
3. Chuck: The chuck is the part of the tool that holds the attachments in place. It is typically a collet or a keyless chuck that allows for easy and quick changing of attachments. Make sure the chuck is compatible with the attachments you plan to use.
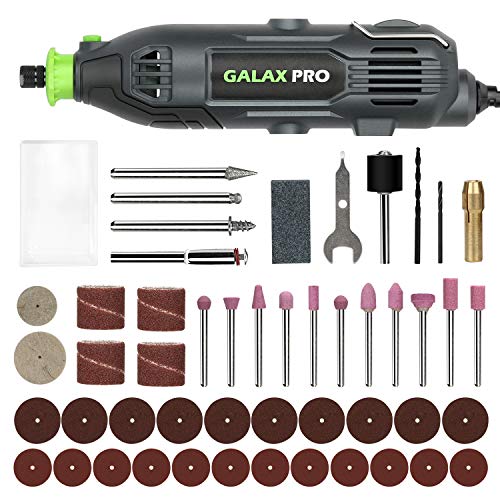
4. Attachments and Accessories: Rotary tools can accommodate a wide range of attachments and accessories, including cutting wheels, grinding stones, sanding discs, polishing pads, and more. Each attachment serves a specific purpose, so it’s important to choose the right ones for your projects.
5. Housing: The housing of the rotary tool is the outer casing that protects the internal components. It should be durable and ergonomic for comfortable and safe use. The housing may also include additional features, such as a built-in LED light or a dust extraction system.

6. Power Source: Rotary tools can be powered by electricity or batteries. Electric rotary tools offer a consistent and uninterrupted power supply, while battery-powered tools offer more portability but may have limited run time.
Understanding the key components of a rotary tool is crucial when making your own or choosing the right tool for your specific needs. By considering these components and their functions, you can ensure that your rotary tool is capable of handling the tasks you have in mind.
Step-by-Step Assembly Guide
Building a rotary tool from scratch can be a challenging but rewarding project. Follow these step-by-step instructions to assemble your own rotary tool:
1. Gather all the necessary components
Before you begin assembling your rotary tool, make sure you have all the required components. This includes the motor, rotary tool head, power supply, electronic speed controller, housing, and any additional accessories you want to attach.
Make sure all the components are in good working condition and free from any damage. Inspect the motor for any loose wires or connections and ensure that the rotary tool head fits securely onto the motor shaft.

2. Connect the electronic speed controller
The electronic speed controller allows you to control the speed of your rotary tool. Connect the speed controller to the power supply and the motor according to the manufacturer’s instructions.
Make sure all the connections are secure and properly insulated to prevent any electrical hazards.
3. Mount the motor
Secure the motor to the housing using the appropriate mounting brackets or screws. Ensure that the motor is properly aligned and tightly secured to prevent any vibrations or movement during operation.
Double-check all the connections and wires to ensure they are properly routed and secured away from any moving parts.
4. Attach the rotary tool head
Attach the rotary tool head to the motor shaft. Make sure it is securely fastened and that the tool head is not loose or wobbly.

Test the tool head by turning on the rotary tool and checking for any unwanted vibrations or noises. If necessary, readjust the attachment to ensure smooth operation.
5. Test and fine-tune
Once the rotary tool is fully assembled, perform a test run to ensure everything is working correctly. Check the speed control, tool head functionality, and overall performance of the rotary tool.
If any adjustments or fine-tuning are necessary, refer to the manufacturer’s instructions or seek assistance from a knowledgeable individual.
Building your own rotary tool can be a gratifying experience, and following this step-by-step assembly guide will help you create a functional and efficient tool for your workshop.
Safety Precautions and Tips
Using a rotary tool can be a practical and efficient way to complete various DIY projects. However, it’s crucial to prioritize your safety when using this tool. Here are some safety precautions and tips to keep in mind:
1. Read the Manual
Before using a rotary tool, take the time to thoroughly read the user manual. Familiarize yourself with the tool’s features, safety precautions, and recommended operating procedures. Understanding how to properly operate the tool will help minimize the risk of accidents or injuries.
2. Wear Protective Gear
Always wear the appropriate protective gear when using a rotary tool. This includes safety goggles or a face shield to protect your eyes from flying debris, as well as gloves to protect your hands from sharp edges or hot surfaces.
3. Secure the Workspace
Prior to starting any project, ensure that your workspace is clean, well-lit, and free from clutter. Make sure that the work surface is stable and secure. This will help prevent accidental slips or falls and maximize your control over the tool.
4. Maintain a Proper Grip
When using a rotary tool, always hold it firmly with both hands. Keep a secure grip on the tool, and avoid gripping the rotating parts or attachments. This will help maintain control over the tool and reduce the risk of accidents.
5. Use the Right Attachments and Accessories
Make sure to use the appropriate attachments and accessories for the task at hand. Using the wrong attachments can result in decreased efficiency and potential safety hazards. Check the user manual or seek professional advice if you are unsure about the correct attachments to use.
6. Switch Off and Unplug When Not in Use
After completing your task, switch off the rotary tool and unplug it from the power source. This will prevent any accidental starts or unwanted activation of the tool. Additionally, store the tool in a safe and dry place to protect it from damage.
7. Work in a Well-Ventilated Area
When using a rotary tool, it is important to work in a well-ventilated area. This will help dissipate any fumes or dust that may be produced during the operation. If necessary, wear a dust mask to protect yourself from inhaling harmful particles.
By following these safety precautions and tips, you can effectively reduce the risk of accidents and injuries while using a rotary tool. Always prioritize your safety and take the necessary precautions to ensure a successful and safe DIY experience.
Maintaining and Using the Rotary Tool
Proper maintenance of your rotary tool is essential for ensuring its longevity and optimal performance. Here are some tips to help you keep your tool in top shape and use it effectively.
Cleaning and Lubricating
Regularly clean your rotary tool after use to remove dust, debris, and other particles that may accumulate on the tool’s surfaces. Use a soft cloth or brush to wipe away any dirt, and avoid using harsh chemicals or solvents that could damage the tool. If necessary, you can use a mild detergent and water solution to clean the tool.
In addition to cleaning, it’s important to lubricate the moving parts of your rotary tool. Apply a small amount of lubricant to the motor shaft and any other areas specified by the manufacturer. This will help reduce friction and prevent wear and tear on the tool.
Inspecting and Replacing Parts
Regularly inspect the various parts of your rotary tool, including the brushes, collets, and attachments, for any signs of damage or excessive wear. If you notice any issues, such as worn-out brushes or loose collets, replace them immediately to avoid further damage to the tool or potential safety hazards.
Using the Rotary Tool
When using the rotary tool, always wear safety goggles and other appropriate protective gear to prevent any injuries. Before starting any task, ensure that the tool is securely fastened and the attachments are properly installed.
Adjust the speed settings of your rotary tool based on the specific task at hand. Lower speeds are typically used for delicate tasks that require precision, while higher speeds are suitable for tougher materials and larger projects.
When using the rotary tool, apply gentle, even pressure to avoid overloading the motor. Let the tool do the work and refrain from forcing it to avoid damage or accidents.
- Always unplug the tool when not in use or when changing attachments.
- Store the rotary tool in a dry and dust-free environment to prevent corrosion and damage.
- Regularly check the power cord for any signs of wear or damage, and replace it if necessary.
By following these maintenance and usage tips, you can ensure that your rotary tool remains in excellent condition and provides you with reliable performance for a long time.
Questions and answers
What is a rotary tool?
A rotary tool is a handheld power tool that rotates a bit or attachment for various DIY and professional tasks.
What can a rotary tool be used for?
A rotary tool can be used for a wide range of tasks, including cutting, grinding, polishing, engraving, carving, sanding, and more. It is a versatile tool that can be used on various materials such as wood, metal, plastic, and glass.


Meet Harrison Clayton, a distinguished author and home remodeling enthusiast whose expertise in the realm of renovation is second to none. With a passion for transforming houses into inviting homes, Harrison's writing at https://thehuts-eastbourne.co.uk/ brings a breath of fresh inspiration to the world of home improvement. Whether you're looking to revamp a small corner of your abode or embark on a complete home transformation, Harrison's articles provide the essential expertise and creative flair to turn your visions into reality. So, dive into the captivating world of home remodeling with Harrison Clayton and unlock the full potential of your living space with every word he writes.


